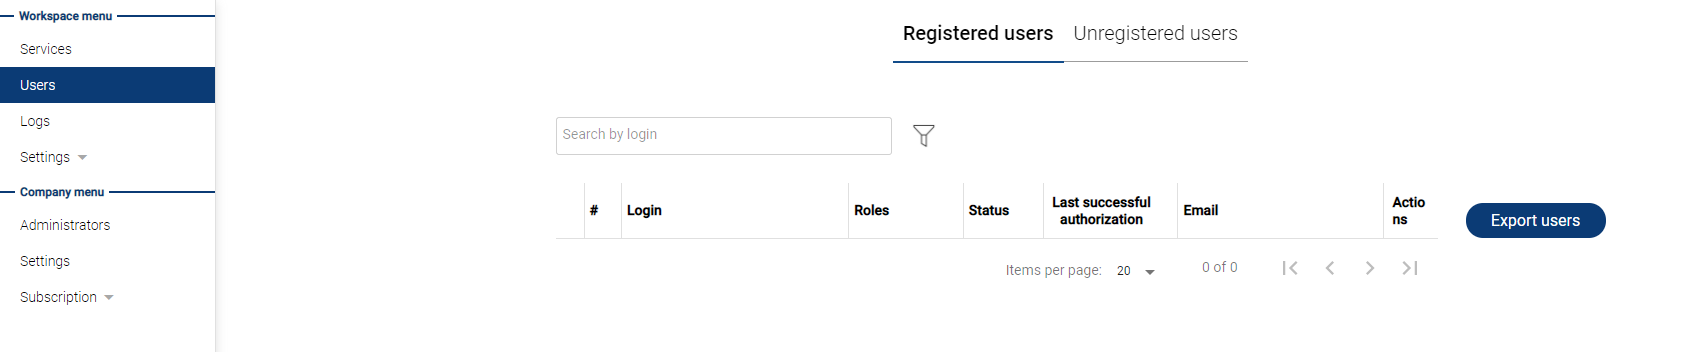
Users
You can view and manage user accounts in your NoPass™ Admin Console. There are common procedures for managing both registered and unregistered user accounts. Other procedures are specific for unregistered users only.
registered and unregistered users
You can view and manage users in your NoPass™ Admin Console.
To manage users' accounts in your NoPass™ Admin Console, navigate to the Users tab in the Workspace menu.
search for users
Procedure
1. To search for a user, start typing the user's login in the Search by login box.
2. Press Enter.
You can also search for a user by their full login.
sort users
To sort the column content in the ascending alphanumeric order, hover over to the column heading and click.

filter users
Procedure
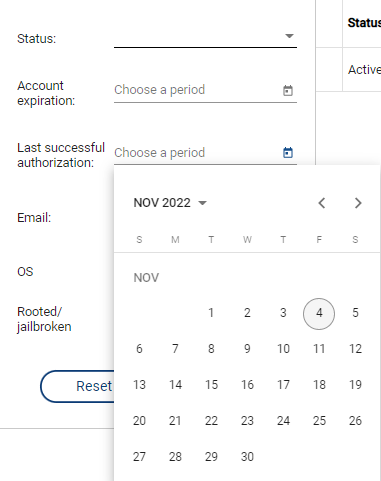
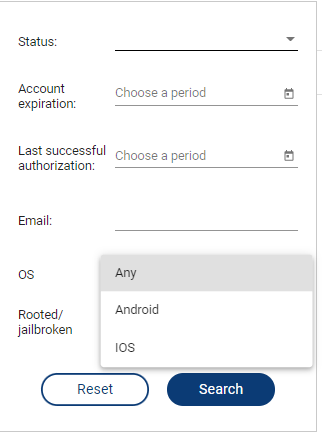
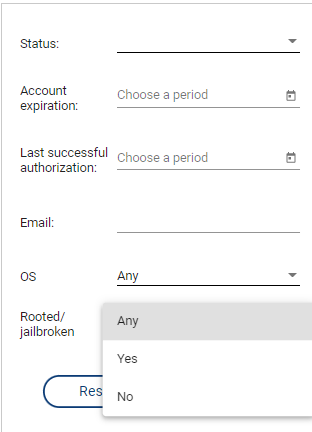
1. To filter users, click ![]() Filter. Set up the filtering criteria in the following window:
Filter. Set up the filtering criteria in the following window:
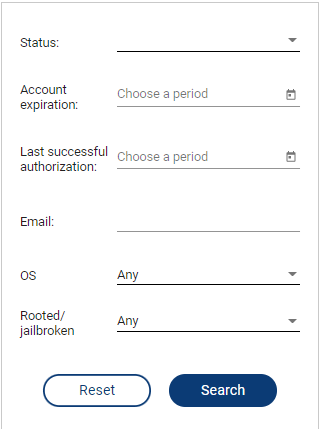
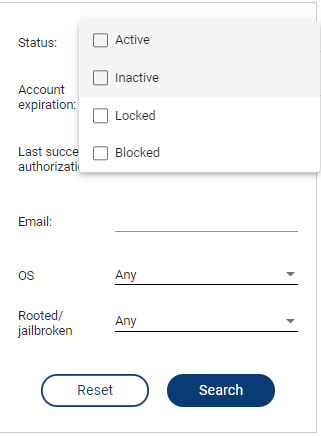
- Status: From the drop-down list, select the user status.
- Account expiration: set up a period by clicking the calendar thumbnail.
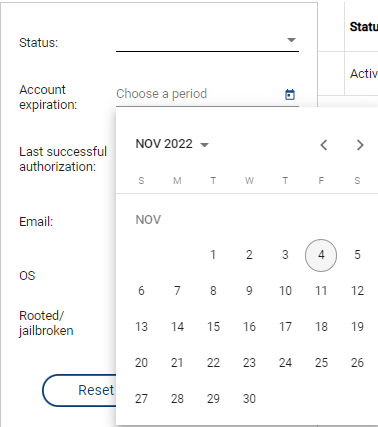
- Last successful authorization: set up a date clicking the calendar thumbnail.
- Email: enter the user's email.
- OS from the drop-down list, select Any, Android, or iOS.
- Rooted/Jailbroken: from the drop-down list, select Any, Yes, or No.
2. To search for a user by the given criteria, click Search.
3. To clear all the fields, click Reset.
export users
Procedure
1. To shift users automatically to a new destination, click Export users.
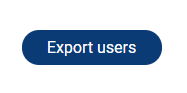
2. Information about user login, email, expiration time, and status are exported to an Excel file.
Edit users
Procedure
1. Select the user account that you want to edit.
2. In the Actions column, click  and perform one of the following actions:
- Select ![]() Edit.
Edit.
- Select  View, then select
 ![]() Edit.
Edit.
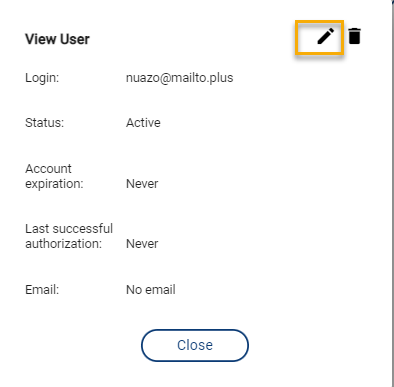
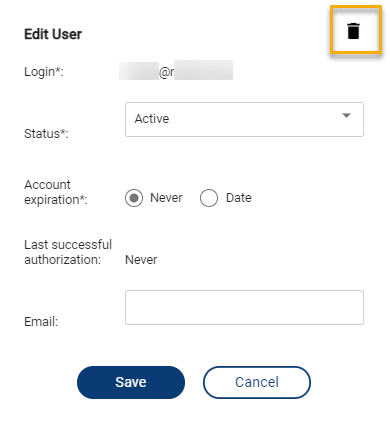
3. Change the required settings in the Edit user window and click Save.

The new data shall be displayed in the Users tab.
delete users
Procedure
1. Select the user account that you want to delete.
2. In the Actions column, click and perform one of the following actions:
- Select  Delete.
- Select ![]() View, then click Delete.
View, then click Delete.
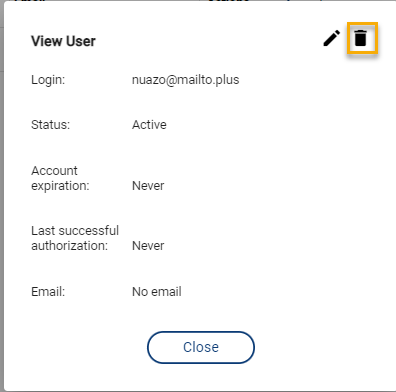
- Select ![]() Edit , then click Delete.
Edit , then click Delete.
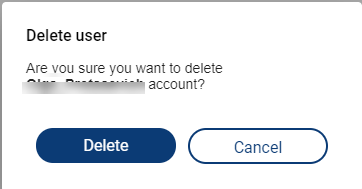
3. In the Delete user dialogue box, click Delete.
unregistered users
In addition to the actions described above, you can perform several other procedures with unregistered users.
To do so, navigate to the Users tab in the Workspace menu. Click Unregistered users.

add users
Procedure
1. To add a new user, click Add user.
2. Fill in the fields in the following window:
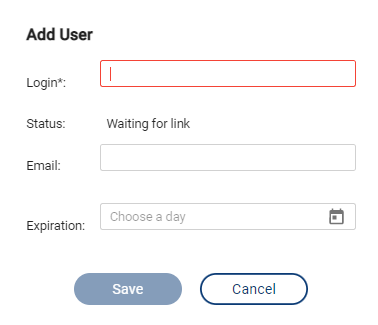
- In the Login field, enter the user's login.
- In the Status field, the Waiting for link status is displayed by default.
- In the Email field, enter the user email for sending the registration link.
- In the Expiration field, set up the account expiration date and time.
3. After you click Save, the user is added.
register a new user
Procedure 1
1. On the Unregistered users tab, select the user you want to register.
2. In the Actions column, select  Send link.
3. Click Send in the dialogue box.
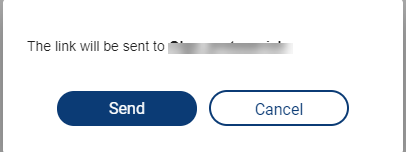
After the link is sent to the user, the user will be able to complete the registration procedure.
Procedure 2
1. On the Unregistered users tab, select the user you want to register.
2. In the Actions column, click and select  Copy link.
3. Send the link you have copied to the user via email or by any other means available so that the user can complete the registration procedure.
Procedure 3
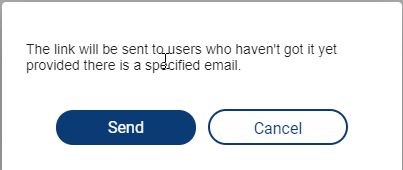
1. To register multiple users, click Send all.
![]()
2. In the dialogue box, click Send.
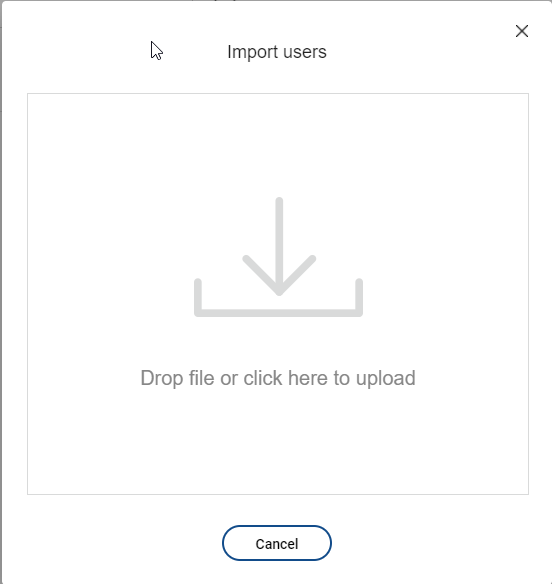
import users
Procedure
1. To import your user database, click Import users.
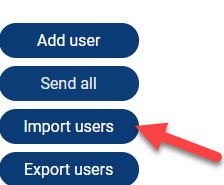
2. In the Import users window, do one of the following:
- Drag your user database .csv file to the window and drop it to upload.
- Click to open the file explorer. Locate your user database file and click Open.
next topic: Logs
previous topic: Admin Tutorial