OpenVPN
The following instructions enable you to add NoPass™ 2FA to your OpenVPN, which requires configuring OpenVPN Access Server and OpenVPN Connect.
Step 1. Configure OpenVPN Access Server
The NoPass™ system is currently working on OpenVPN Access Server v2.7.3.
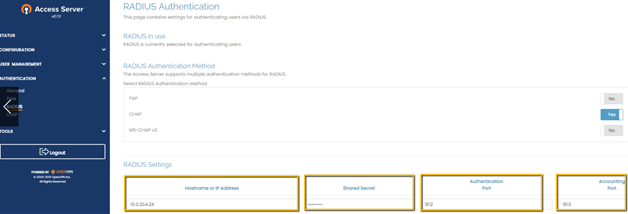
- In the OpenVPN Access Server application, in RADIUS Authentication, enter and save the following settings: The Hostname or IP Address, Shared Secret, Authentication Port, and Accounting Port.
Make sure these values are the same as in the RADIUS Admin console.
Step 2. Access OpenVPN Connect using NoPass™ 2FA: User instructions
As an Administrator, provide the following instructions to your network users.
Install the OpenVPN Connect application
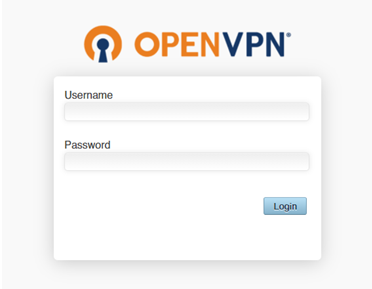
- On the Open VPN connection page, enter your domain login and password.
- On the next page, select the platform to download the OpenVPN application. Local administrator permissions are required.

- Download/run the *.msi file to start the application installation.
- On the same page, select Yourself (user-locked profile), download, and save the configuration file.
- After installation is completed, right-click the OpenVPN icon. Click Import and then select From local file.
- In the Explorer, navigate to the corresponding directory, and select the configuration file saved during Step 4.
Connect to OpenVPN
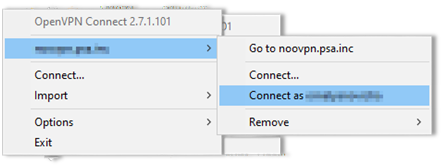
- Right-click the OpenVPN icon. Click the corporate VPN network, and then select a user.
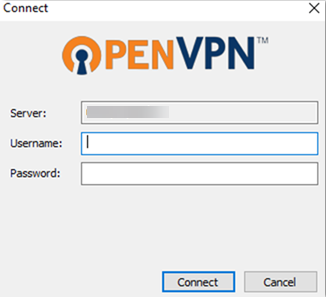
- In the dialog box, enter your username and password.
- On the OpenVPN – Warning popup click Yes, to allow OpenVPN to connect to your corporate VPN server.
- On your smartphone with the NoPass™ application, accept the push authentication notification.
If the connection is successful, the OpenVPN icon on your desktop changes: