Salesforce
Salesforce offers the following ways to use SSO:
- Federated authentication using Security Assertion Markup Language (SAML).
- Federated authentication using OpenID Connect protocol.
The procedure below describes the integration based on SAML 2.0, however, you can choose the protocol up to your liking.
For more information about Salesforce SSO protocols configuration, see Configure Salesforce as the Service Provider with SAML Single Sign-On.
Procedure
STEP 1. COPY THE IDP METADATA FROM KEYCLOAK
- Log in to your Identité® Keycloak to get your Identity Provider’s SAML metadata from Realm Settings.

STEP 2. CONFIGURE SAML FOR SSO
- In Salesforce, in the Setup tab, in the Quick Find box, enter Single Sign-On Settings, select Single Sign-On Settings, and then click Edit.
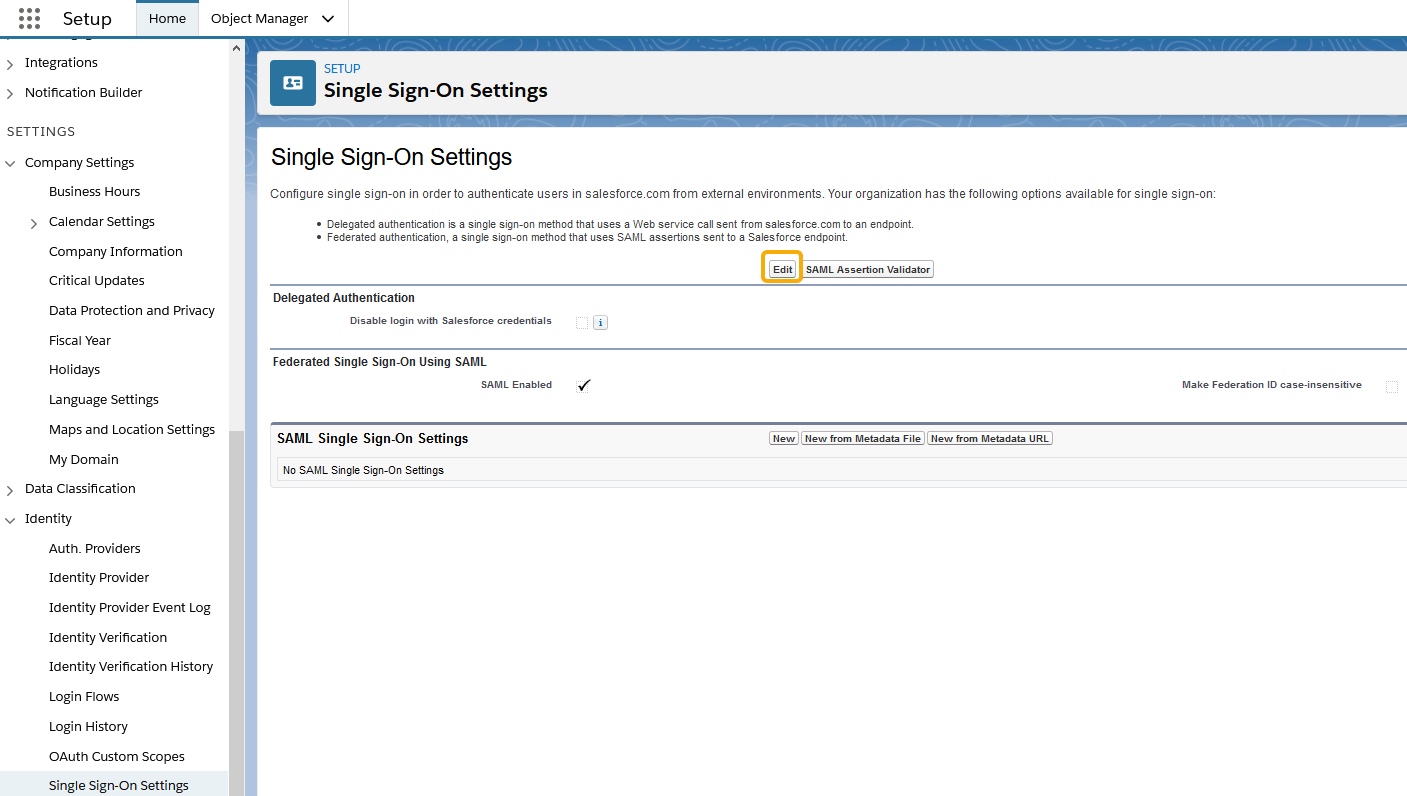
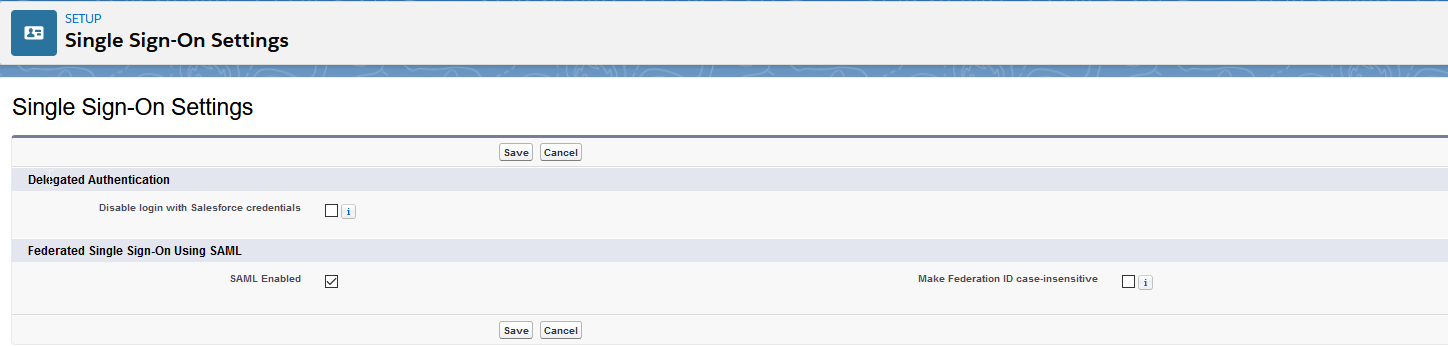
- To view SAML single sign-on settings, select SAML Enabled, and click Save.
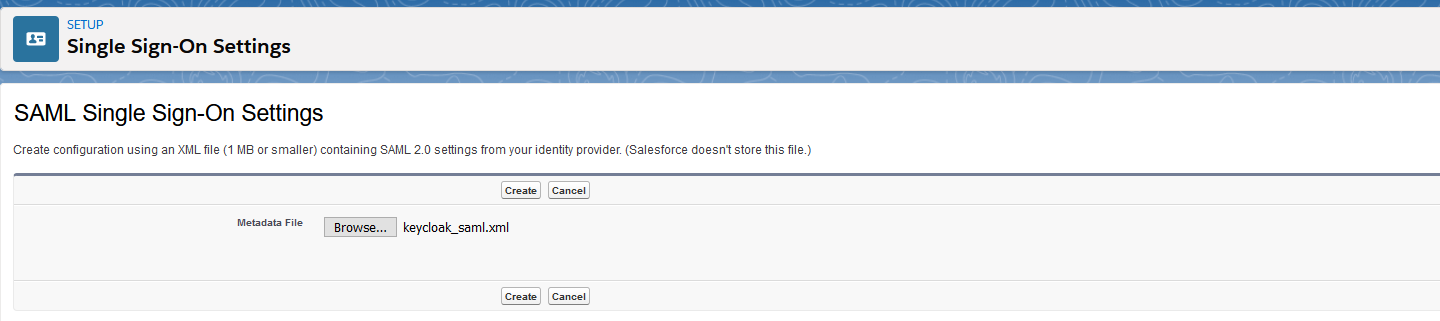
- In SAML Sign-On Settings, click one of the following buttons to create a configuration:
- New—to specify all settings manually.
- New from Metadata file—Import SAML 2.0 settings from an XML file from your identity provider. This option reads the XML file and uses it to complete as many of the settings as possible.
- New from Metadata URL—Import SAML 2.0 settings from a public URL. This option reads the XML file at a public URL and uses it to complete as many of the settings as possible. The URL must be added to Remote Site Settings to access it from your Salesforce org.
4. Name this setting for referencing within your organization. Salesforce inserts the corresponding API value, which you can customize if necessary.
5. In the Single-On Settings, configure the following, and then click Save:
| Issuer | It is often referred to as the Entity ID for the identity provider. |
| Identity Provider Certificate | Click Browse to locate and upload the authentication certificate issued by your identity provider. The certificate size cannot exceed 4 KB. If it does, try using a DER-encoded file to reduce the size. |
| Request Signing Certificate | SELECT the certificate you want from the ones saved in your Certificate and Key Management settings. |
| Request Signature Method | Select the hashing algorithm for encrypted requests, either RSA-SHA1 or RSA-SHA256. |
| Assertion Decryption Certificate | Optional. If the identity provider encrypts SAML assertions, select the assertion decryption certificate saved in your Certificate and Key Management settings. This field is available only if your org supports multiple SSO configurations. |
| SAML Identity Type SAML Identity Location and other fields described in Identity Provider Values |
Specify the values provided by your identity provider, as appropriate. |
| Service Provider Initiated Request Binding | Select the appropriate value based on the information provided by your identity provider. |
| Custom Error URL | Specify the URL of the page that the users are directed to if there is an error during SAML login. It must be a publicly accessible page, such as a public site Visualforce page. The URL can be absolute or relative. |
| SAML 2.0 | If your identity provider has specific login or logout pages, specify them in Identity Provider Login URL and Custom Logout URL, respectively. |
6. If your Salesforce org has domains deployed, specify whether you want to use the base domain or the custom domain for the Entity ID. Share this information with your identity provider.
7. Optional. Set up Just-in-Time user provisioning. For more information, see Enable Just-in-Time user provisioning and About Just-in-Time Provisioning for SAML.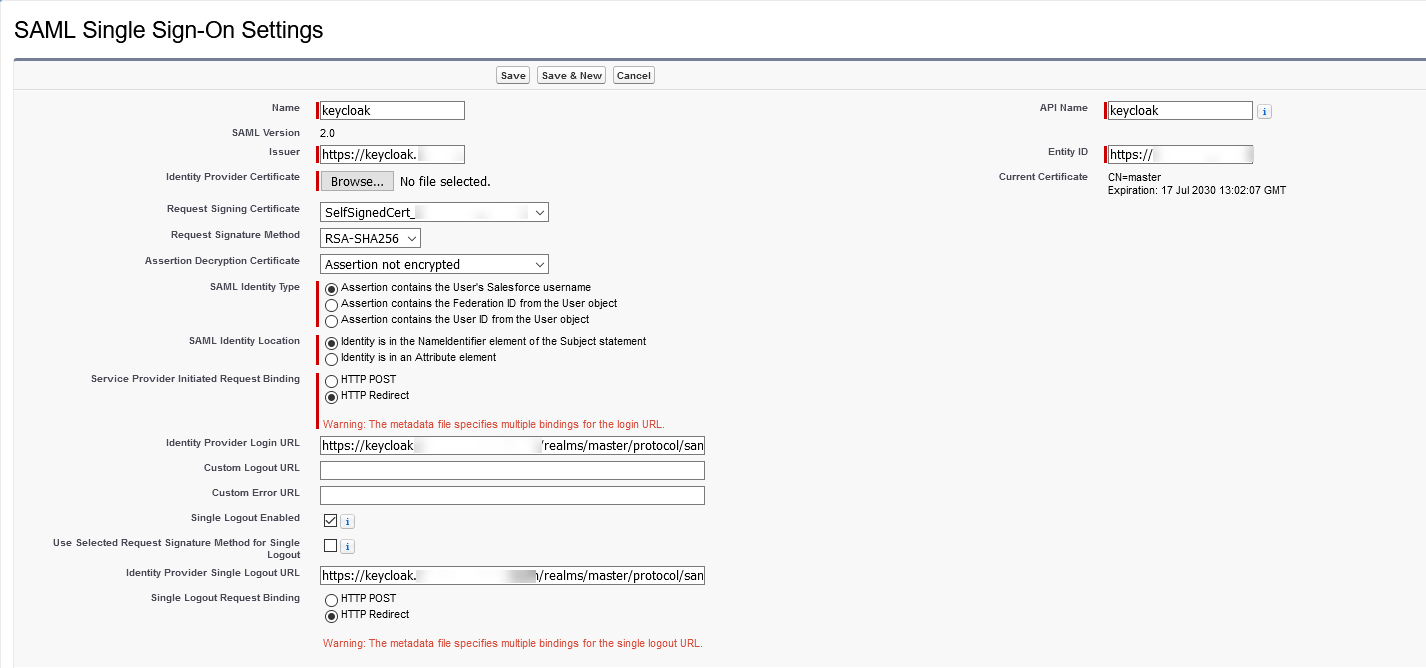
- To download the .xml file of your SAML configuration settings, click Download Metadata.
STEP 2. CONFIGURE A NEW CLIENT IN KEYCLOAK
- Open the Keycloak administration console and select the realm that you want to use.
- From the left navigation bar, select Clients and click Create.

- Import the file that you downloaded earlier, and then click Save.

- Set the following parameters:
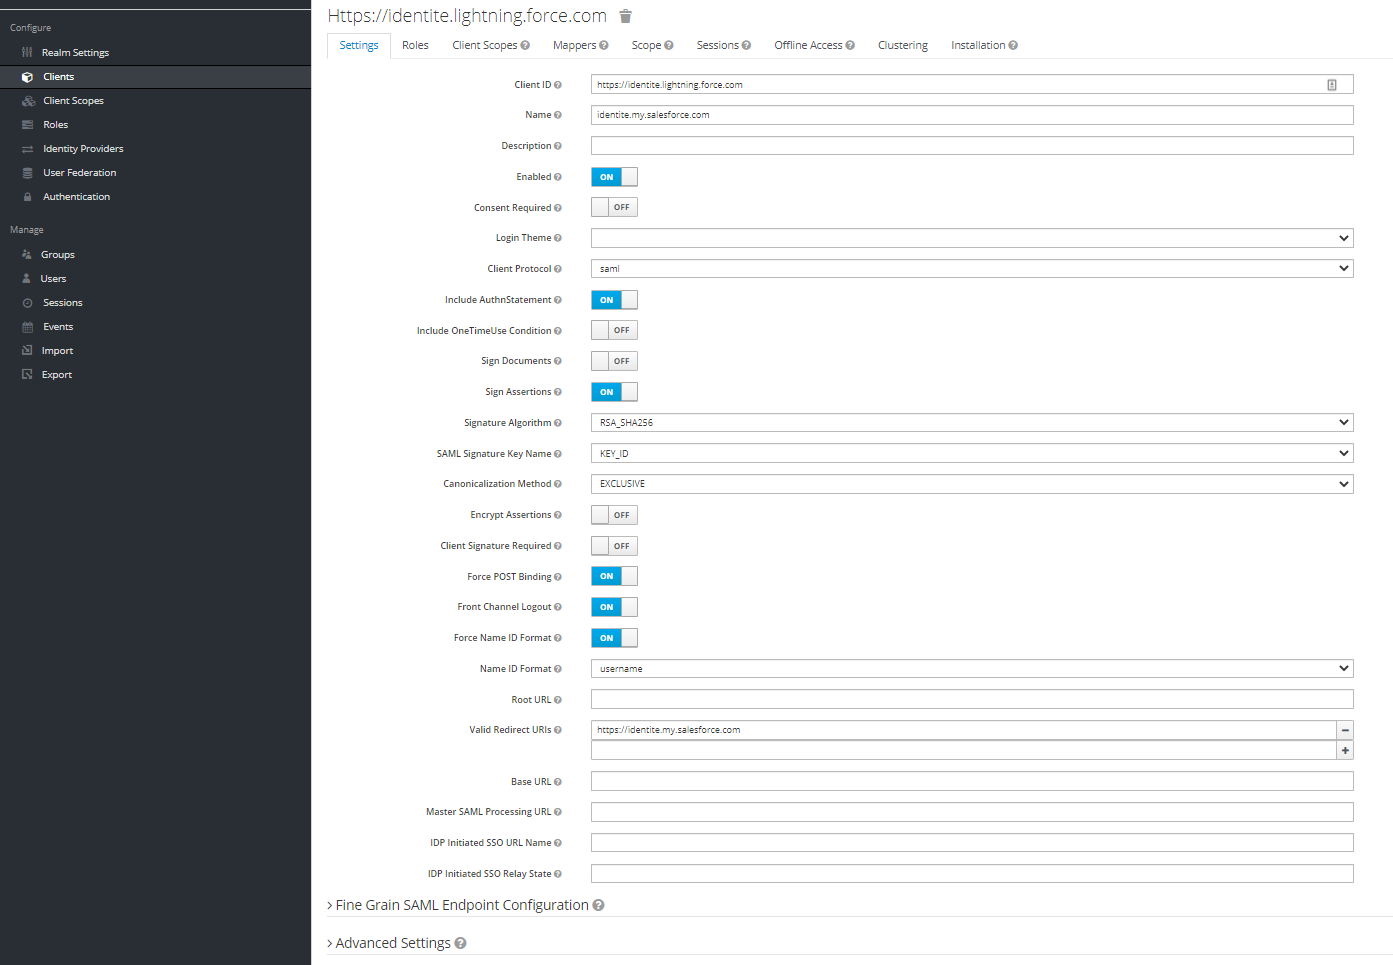
- Under Fine Grain SAML Endpoint Configuration, configure the following:
Assertion Consumer Service POST Binding UR The ACS (Assertion Consumer Service) URL from Service Provider Metadata Logout Service Redirect Binding URL The Single Logout URL from Service Provider Metadata
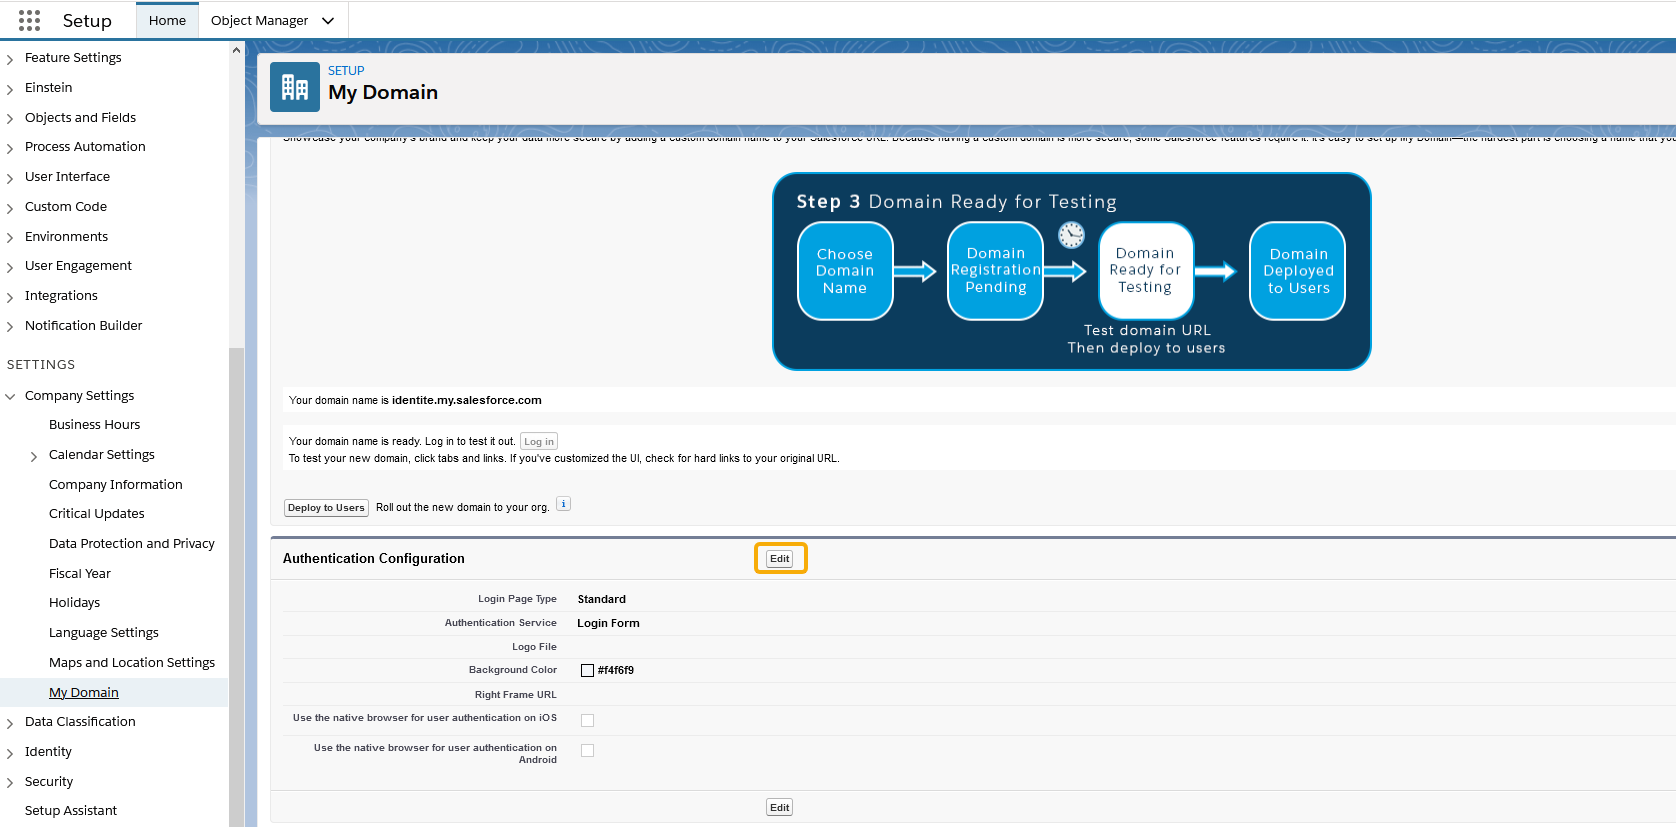
STEP 3. CONFIGURE SALESFORCE
- To redirect Salesforce, login to Keycloak IdP for Single Sign On (SSO), and enable authentication method type. Go to Setup, and then select My Domain. In the Login Page Branding section, select Edit:
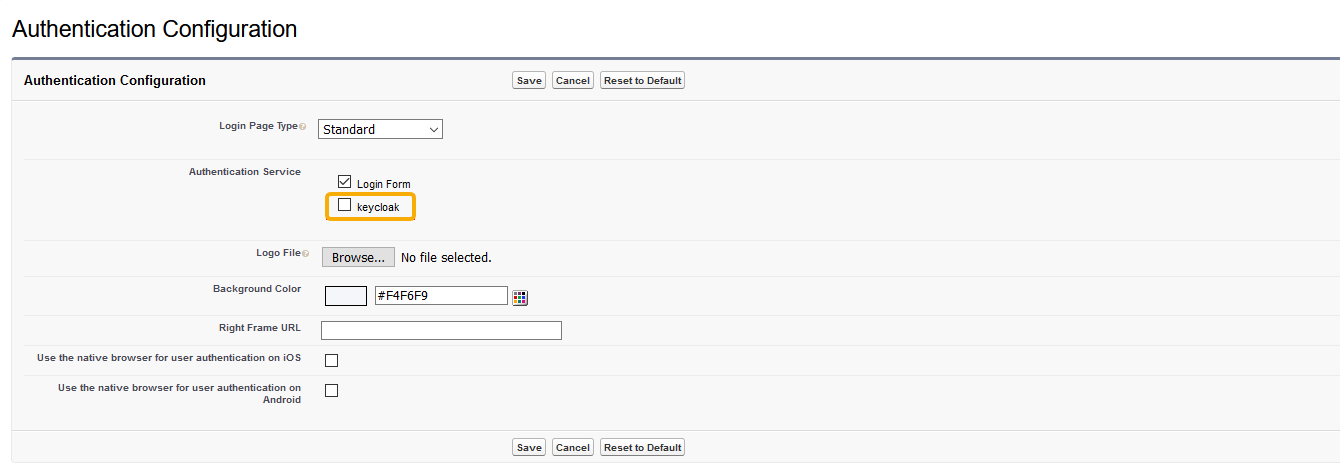
- Enable another authentication type:
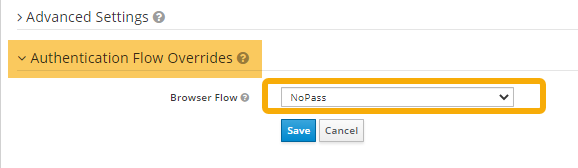
STEP 5. ENABLE NOPASS AUTHENTICATION FLOW
Navigate to the Clients menu in the Keycloak administration console and do the following:
- On your client Settings tab, scroll down to the bottom of the page and select the Authentication Flow Overrides.
-
From the drop down menu, select the NoPass flow, and then click Save.
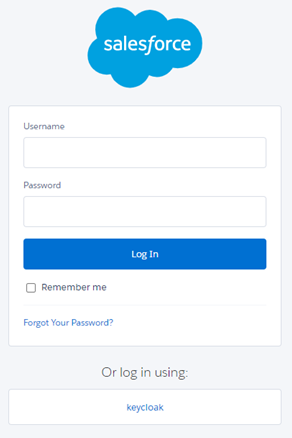
Now Salesforce is protected with NoPass™.